
There are a lot of things that occur each day that remind me of my childhood. A song on the radio, a specific model of car, a certain spoken phrase or even the way the sun and clouds look can bring back a flood of memories of my youth. However, there is one sensory experience that I associate with a specific person and place from my past, that person is my sainted grandmother and the sensory experience is the smell of a simple, fresh roasted chicken.
On the weekends, my mother would drive us over to my grandparents’ house to visit. We could always tell what we were having for dinner from the moment we opened the door. The aroma from grandma’s kitchen would envelop us like a warm, comfortable blanket and fill us with a feeling of home. I always loved that experience. There was nothing my grandmother made that I did not truly enjoy, but nothing got my mouth watering and stomach talking like her fresh roasted chicken.
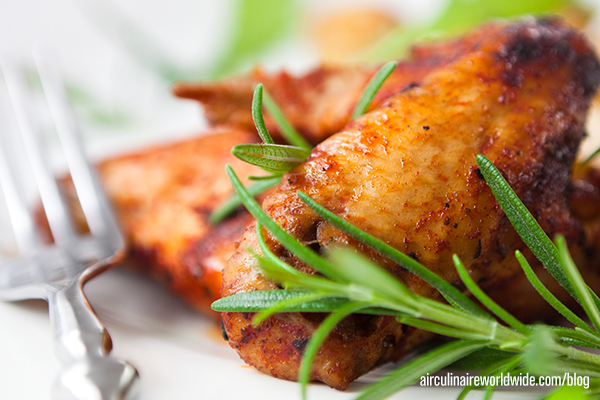
As part of the back to basics series, I present my grandmother’s very easy and straight forward recipe for roasting a whole chicken, along with her exact reasons for each step and ingredient. I learned this method at a very young age and over time I have adopted it to specific meals or audiences. Still to this day nothing compares to this memorable recipe.
Ingredients
Whole Roaster Chicken 1 each
There are different sizes of whole chickens available at the market, but the best to use for roasting is called a “roaster.” This bird young bird is about 3 to 6 pounds on average and has plump skin that is rich in fat content, as well as well filled-in muscle meat.
Whole Unsalted Butter 6 oz. /225g
Whole butter is used because of its smoke point and its flavor. The medium smoke point promotes a golden-browning effect on the skin of the bird, and adds a rich flavor to the meat. Oils, like nut or olive oils, can interfere with the taste of the bird and create an oily texture to the meat and skin.
Fresh Thyme 2 oz. /60g
Herbs are not absolutely necessary when roasting a chicken, but do add a nice flavor to the meat as well as the natural jus released during the cooking process. Thyme is perfect for roasted poultry, as it adds an herbaceous flavor that is pleasant and noticeable but not overpowering like rosemary or sage.
Kosher Salt 1 oz. /30g
Table salt is saltier in flavor than kosher salt and too much can result in salty tasting meat. Kosher salt dissolves in liquids better than table salt allowing the subtle salt flavor to easily penetrate the meat. The large crystals of kosher salt also are easier to evenly distribute and adhere to the skin of the bird better than ordinary table salt.
Cracked Black Pepper ½ oz. /15g
Fresh cracked black pepper adds an earthy, moderate heat to the overall taste. As the bird heats in the oven, the cracked peppercorns release their oils directly into the skin and meat of the bird. Like the kosher salt, the larger pieces of the black pepper also are easier to evenly distribute and adhere to the skin of the bird better.
Method
- Pre-heat oven to 375 F/190 C.
- A pre=heated oven will start the cooking process from the moment you place the chicken into the oven. If the oven is not pre-heated, it will take considerable time for the chicken to reach a safe cooking temperature, as well as take more time to cook. The 375 F/190 C temperature provides a proper level of heat to evenly melt the fat in the skin and cook the meat to a tender and moist texture.
- Inspect the outside of the chicken for any remaining quills or follicles and remove them.
- Most chickens are mechanically cleaned by the producer, but at times the machine can miss some of the quills or follicles. Cooking the quills or follicles will not interfere or change the flavor, but do not look attractive on a finished bird.
- Remove the giblets from the inside cavity.
- Giblets consist of the neck, heart, liver and gizzards. Most whole birds come with the giblets included in the cavity of the bird and are used to make gravy or stuffing. Failure to remove these items, especially the liver and heart, can alter the taste of the finished product.
- Under cold running water, rinse the inside cavity out and drain all water.
- Rinsing the inside cavity of the bird removes any residual liquid or pieces from the inside of the bird. This type of chicken is usually kept at a very cold temperature and there might be a small buildup of ice inside the cavity. Rinsing with water will remove the ice.
- Using clean paper towels, pat dry the entire outside of the chicken.
- A dry outer surface gives the butter, herbs and spices a surface to attach to. If the bird is not dry, anything you put on it will simply fall off into the bottom of the roasting pan. If time allows, it is best to leave the chicken uncovered in the refrigerator for several hours allowing the bird to dry out even more.
- Place the prepped bird breast up on a roasting pan that has a lip.
- A lipped roasting pan will keep any juices from spilling into the oven, as well as capture the natural jus for creating a sauce or gravy.
- Evenly coat the inside and outside of the chicken with the melted butter, thyme, salt and pepper.
- An even distribution of these ingredients promotes even flavoring throughout the entire bird.
- Place the roasting pan into the pre-heated oven.
- Placing the chicken on a roasting rack will allow hot air to travel under the bird, cooking it more evenly.
- Cook the chicken for 35 minutes at the 375 F/190 C temperature and then increase the heat to 425 F/220 C for an additional 15 minutes.
- The starting heat is substantial to melt the fat in the skin and cook the meat. Increasing the heat will crisp up the fat-rendered skin, as well as finish cooking the meat.
- Insert an instant-read thermometer into the thick part of the thigh to check if the bird is done. The temperature should read at least 160 F/72 C before removing from the oven. If more time is needed re-temp the bird at 5 to 7 minute intervals until the temperature reaches a minimum of 160 F/72 C.
- Failure to fully cook the bird to 160 F/72 C can result in an undercooked chicken and may create an unsafe product for consumption, resulting in a possible foodborne illness. At a minimum of 160 F/72 C any harmful bacteria in the meat is destroyed. Some cooks will say that if the juices from the bird “run clear,” the bird is fully cooked; but this method is not foolproof. It is better to be safe than sorry when dealing with a potential food illness hazard.
- When the bird is at the proper temperature, remove the roasting pan from the oven and allow it to sit undisturbed for a minimum of 5 minutes.
- This resting time allows the moisture in the chicken to return to a calm state. Cutting, or removing parts from the chicken immediately after cooking, can cause the chicken to rapidly lose its moisture; resulting in dry and bland meat.
- Place the rested chicken onto a clean cutting board and pour off the remaining natural jus from the roasting pan, scrapping any leftover pieces on the pan. Reserve this liquid for making a sauce or for future use.
- Carve the chicken into the desired pieces and enjoy.
Advanced Applications
There are a number of seasonings and herbs that can be applied to this simple recipe to create unique flavors and culinary styles. Some of these styles work better if the chicken is placed in the seasoning mixture and allowed to marinate for 24 to 36 hours prior to cooking.
- Cajun – garlic, cayenne pepper, paprika, garlic, thyme, oregano, red pepper flakes, salt and pepper
- Cantonese – garlic, sugar, oyster sauce, soy sauce, dry white wine, salt and pepper
- Mediterranean – lemon zest, oregano, rosemary, basil, garlic, salt and pepper
- Cuban – espresso coffee, cumin, garlic, onion, mustard seed, salt and pepper
- Spanish – saffron, garlic, flat leaf parsley, smoked paprika, salt and pepper
- Moroccan – cinnamon, cumin, turmeric, curry, sugar, lemon zest, salt and pepper
- Jamaican – all spice, coriander, ginger, nutmeg, thyme, brown sugar, scallions, scotch bonnets
Reserving the leftover bones from the chicken can be frozen and used for making a chicken stock for use in other dishes.
Enjoyed making this recipe? Follow us on Instagram and tag us in your culinary creations. Need help making this recipe? Tweet @airculinaire for assistance.
Questions?
If you have any questions about this recipe, contact me at rpeterson@airculinaire.com. For questions about in-flight catering , contact weborders@airculinaire.com.